

How to Repair Minor Scratches on Your Car

Every car owner knows the frustration of seeing a scratch on their vehicle’s paintwork. Fortunately, minor scratches can often be resolved easily and cost-effectively with some basic touch-up techniques. By learning how to repair these imperfections, you can maintain your car’s aesthetic appeal and protect its value.
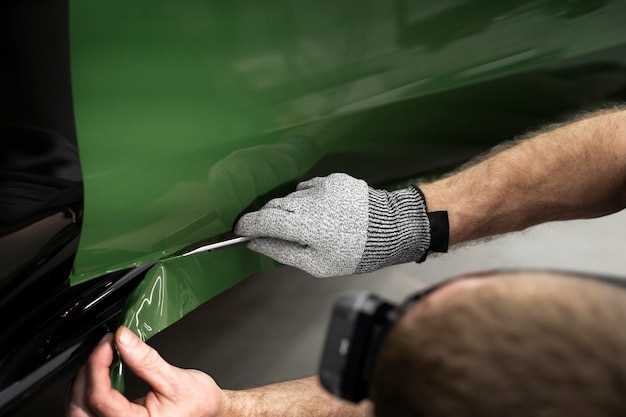
Touch-up paint is specifically designed to help you address these small issues without the need for professional assistance. Whether it’s a deep scratch or just a surface scuff, knowing how to properly apply paint can make a significant difference. With the right tools and materials, repairing minor scratches on your car can not only be achievable but also quite satisfying.
In this article, we will explore simple yet effective methods for repairing minor car scratches. You will learn about the types of touch-up products available, as well as step-by-step instructions to effectively restore your car’s exterior. With a little patience and effort, you’ll be able to give your car a refreshed look and safeguard its paint from further damage.
Choosing the Right Paint for Touch-Ups
Selecting the appropriate paint for your touch-up repairs is crucial to restore your vehicle’s appearance effectively. When dealing with scratches, the first step is to identify the vehicle’s specific color code, which can usually be found inside the driver’s side door or in the engine compartment. This code enables you to purchase paint that closely matches your car’s original hue.
Next, consider the type of paint you need. Automotive touch-up paint generally comes in two forms: brush-on and spray cans. For smaller scratches, a brush-on paint may be more precise and easier to control. Alternatively, spray cans are suitable for larger areas requiring coverage. Ensure the paint is specifically formulated for automotive use to ensure durability and a proper finish.
It’s also beneficial to choose a paint that includes a clear coat for added protection. This layer not only enhances the shine but also helps prevent future scratches and chips. If you prefer a single-stage solution, some products combine both color and clear coat in one application.
Finally, before applying the paint, perform a test in an inconspicuous area to verify the match and finish. This step helps you avoid any surprises after application and ensures that your repairs seamlessly blend with the surrounding surfaces.
Step-by-Step Guide to Scratch Repair

Repairing minor car scratches can significantly enhance the vehicle’s appearance and protect against further damage. Follow these simple steps to effectively tackle the scratches on your car’s surface.
Step 1: Clean the Area
Begin by thoroughly washing the scratched area with soap and water. This removes dirt and debris that could interfere with the repair process. Rinse and dry the area completely using a soft cloth.
Step 2: Assess the Scratch
Examine the depth of the scratch. If it hasn’t penetrated beyond the clear coat, a touch-up paint application will suffice. However, deeper scratches may require sanding before applying paint.
Step 3: Sand the Scratch (if necessary)
If the scratch is deep, use fine-grit sandpaper (2000 grit) to gently sand the area around the scratch. Be careful not to sand too aggressively, as this could damage the surrounding paint. Wipe away any dust with a clean cloth.
Step 4: Apply Touch-Up Paint
Select a touch-up paint that matches your car’s color. Use a fine brush or a paint pen for precision. Apply the paint directly to the scratch, ensuring even coverage. Let the paint dry completely as indicated on the label.
Step 5: Clear Coat Application
For additional protection and to achieve a glossy finish, apply a clear coat over the touch-up paint once it is dry. Use a clean brush for this step, and allow it to cure based on the product instructions.
Step 6: Final Buffing
Once the clear coat has dried, lightly buff the area with a soft cloth to blend the repair with the surrounding paint. This will enhance the shine and make the repair less noticeable.
By following this step-by-step guide, you can easily repair minor scratches on your vehicle, restoring its appearance and value while saving on professional repair costs.
Tools You Need for DIY Scratch Fixes
To effectively repair minor scratches on your vehicle, having the right tools is crucial. Here’s a list of essential items that will aid in your DIY touch-up process.
First, start with a gentle cleanser and microfiber cloth. Before applying any touch-up paint, thoroughly clean the scratched area to remove dirt and debris. This step ensures better adhesion of the repair materials and a smoother finish.
Next, a fine-grit sandpaper (around 2000 grit) is necessary for smoothing out the scratch edges. Lightly sanding the area will help prepare it for the application of touch-up paint and will blend the repaired spot with the surrounding surface.
A quality touch-up paint that matches your vehicle’s color code is essential. Most automotive retailers offer a variety of options, including pens or small bottles for easy application. Ensure the paint is specifically designed for automotive use to achieve the best results.
You will also need a small brush or applicator. This tool allows for precise application of touch-up paint and control over the amount being applied to avoid excess buildup.
For additional finishing, consider having clear coat spray or pen on hand. This seals the repair, enhances the shine, and provides extra protection against future scratches.
Lastly, a polishing compound and an applicator pad will help to buff the repaired area once the touch-up paint and clear coat have dried. This process restores the gloss and blends the repaired section with the rest of the car’s surface.
With these tools, you can effectively tackle minor scratches and keep your vehicle looking its best.