

How to Repair a Flat Tire Safely

When it comes to car maintenance, one of the most common issues drivers face is dealing with a flat tire. Whether caused by a sharp object on the road or natural wear and tear, a flat tire can quickly turn a routine journey into a significant inconvenience. Understanding how to safely and effectively repair a flat tire not only saves time but can also prevent further damage and ensure your safety on the road.
In this article, we will explore various safe methods for repairing a flat tire, highlighting essential tools and techniques that every driver should know. From the simple process of using a tire sealant to the more traditional approach of patching, we will cover everything you need to consider when faced with this common automotive challenge. By following these methods, you can gain confidence in your ability to handle unexpected tire issues, ensuring smoother travels ahead.
Before you attempt any repairs, it’s crucial to assess the damage to your tire and determine if it can be safely repaired or if it requires replacement. This understanding is vital in making informed decisions that will keep you and other road users safe. Let’s delve into the best practices for repairing a flat tire and equip yourself with the knowledge necessary to handle this situation effectively.
Assessing the Damage: When to Repair or Replace
When faced with a flat tire, it is crucial to evaluate the extent of the damage before deciding whether to repair or replace it. Several factors come into play in this assessment.
Location of the Damage: One of the primary considerations is the location of the puncture. If the damage is on the tread area and is smaller than 1/4 inch in diameter, it is generally repairable. However, if the damage occurs on the sidewall or the shoulder of the tire, replacing it is usually necessary, as repairs in these areas are often unsafe.
Magnitude of the Damage: Besides location, the size of the damage is equally important. Multiple punctures or large tears often indicate that the tire has sustained significant harm and should be replaced rather than repaired. If there are multiple damages close together, the integrity of the tire is compromised, making replacement the safer option.
Age and Condition of the Tire: The overall condition and age of the tire should not be overlooked. Tires that show signs of wear, such as cracks, bulges, or severe tread wear, may pose safety risks, even if they are flat. In such cases, replacing them is a wiser choice for maintaining optimal safety on the road.
Type of Tire: Different types of tires have varied thresholds for repairability. For instance, performance or high-performance tires may possess less tolerance for damage compared to standard tires. It is essential to consult manufacturer guidelines to determine if a flat tire can be safely repaired.
Ultimately, understanding when to repair or replace a flat tire is vital for ensuring safety and maintaining vehicle performance. Always assess the damage carefully and, when in doubt, consult a professional for advice on the best course of action.
Step-by-Step Guide to Using a Tire Repair Kit
When faced with a flat tire during an emergency, knowing how to utilize a tire repair kit can save you time and stress. Follow this step-by-step guide to effectively repair your tire and get back on the road.
First, ensure you have all necessary tools: tire repair sealant, a valve core remover, and a tire plug. Lay these tools out in an organized manner to facilitate an efficient repair process.
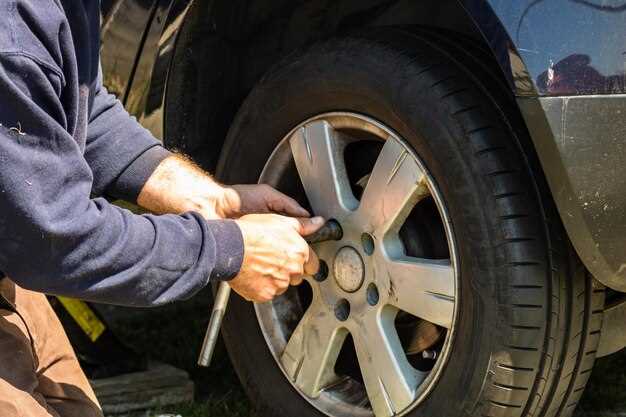
Begin by safely parking your vehicle on a stable and flat surface. Engage the parking brake and turn on your hazard lights to alert other drivers. Remove the flat tire by using a lug wrench to loosen the lug nuts. This will involve turning the nuts counterclockwise until they are free, allowing you to take off the tire.
Inspect the tire to locate the puncture. Once found, clean the area around the puncture using a cloth to ensure proper adhesion of the repair materials. If your kit includes a reamer tool, insert it into the hole and twist it to enlarge and clean the puncture, preparing it for the tire plug.
Next, take one of the tire plugs from your repair kit. Apply a small amount of rubber cement to the plug to create a seal. Insert the plug into the puncture hole using the insertion tool provided in your kit. Push the plug firmly until about two-thirds of it is inside the tire, then remove the insertion tool, leaving the plug in place.
After the plug is inserted, check for any air leaks by applying a soapy water solution around the repair area. Look for bubbles indicating escaping air. If no leaks are detected, you can proceed to inflate the tire to the recommended pressure using an air pump.
Once inflated, reattach the tire to your vehicle. Align the holes in the rim with the lug bolts and hand-tighten the lug nuts in a star pattern for even distribution. Finally, use the lug wrench to securely tighten each nut.
Before driving away, double-check that the tire is properly inflated and the lug nuts are tight. Store your tire repair kit back in your vehicle for future emergencies.
Safety Precautions During Emergency Tire Repairs
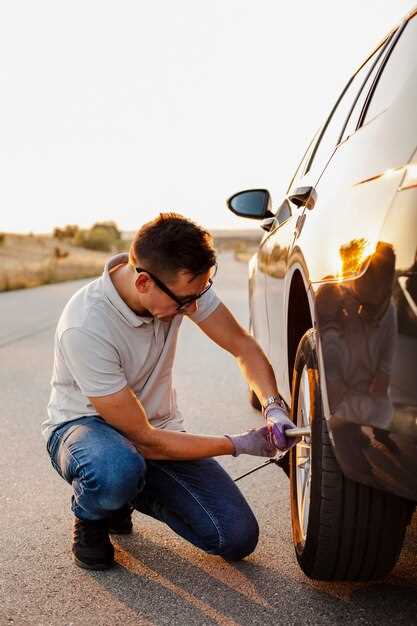
When faced with a flat tire, safety should be your top priority during repairs. Start by finding a secure location away from traffic, ideally on a flat and stable surface. Turn on your hazard lights to alert other drivers of your situation.
Before attempting any repair, ensure that your vehicle is in park mode and the parking brake is engaged. This reduces the risk of your car rolling while you are working. If you have wheel chocks, place them behind the opposite tires for additional security.
Wear appropriate personal protective equipment, such as gloves and safety glasses, to shield your hands and eyes from sharp objects and debris. If you plan to use a jack, read the vehicle’s manual to locate the recommended lifting points. Using an incorrect jack placement can lead to accidents.
While lifting the vehicle with a jack, keep your body clear of the moving parts. Never place any part of your body under the vehicle while it is supported only by a jack. Always use a jack stand for additional safety once the vehicle is lifted.
Inspect the flat tire for any visible damage before proceeding with repairs. If the tire has a significant tear or is beyond repair, it may need to be replaced instead. Be cautious when handling the tire, as sharp objects or embedded debris can cause injuries.
After completing the repair, recheck that all tools are clear of the area before lowering the vehicle. Finally, ensure that the tire pressure is restored to the recommended levels before resuming your journey.
By following these safety precautions, you can effectively manage an emergency tire repair while minimizing risks to yourself and others.