

How to Inspect a Driveshaft

The driveshaft is a critical component of your vehicle’s drivetrain, responsible for transferring torque from the engine to the wheels. Regular inspection of the driveshaft is essential for maintaining optimal vehicle performance and ensuring a safe driving experience. Over time, driveshafts can experience wear and tear due to road conditions, driving habits, and general use, making it imperative for vehicle owners to familiarize themselves with the signs of potential issues.
In this guide, we will explore the key aspects of inspecting a driveshaft, highlighting the common problems that can arise and how to identify them early. We will cover the tools required for effective inspection, the specific areas to examine, and the signs that may indicate a need for repair or replacement. Understanding your driveshaft and its condition can save you from costly repairs down the line and help maintain the integrity of your vehicle.
Whether you are a seasoned mechanic or a DIY enthusiast, knowing how to assess the driveshaft is a valuable skill. With proper maintenance and attention, you can enhance your vehicle’s longevity and performance. Let’s delve into the essentials of driveshaft inspection and empower you to take control of your vehicle’s maintenance.
Identifying Symptoms of Driveshaft Issues
When it comes to vehicle maintenance, recognizing the signs of driveshaft problems is crucial for preventing further damage. A driveshaft is responsible for transferring power from the transmission to the wheels, and any issues can impact the vehicle’s performance. Here are key symptoms to watch for.
One of the primary indicators of driveshaft issues is unusual vibrations while driving. If you notice excessive shaking during acceleration or at higher speeds, this could suggest that the driveshaft is out of balance or has worn universal joints. These vibrations can become more pronounced during specific conditions, such as when accelerating or making sharp turns.
A second symptom to be aware of is a clunking noise that occurs when shifting gears or accelerating. This noise typically results from loose or damaged components within the driveshaft assembly. Listening for these sounds can help diagnose the problem early, preventing extensive repairs down the line.
Additionally, a noticeable increase in rotational play in the driveshaft can indicate wear and tear. If you feel a lag or see a delay in the rotation of the wheels in response to accelerator input, this could suggest that your driveshaft is not functioning as it should. Such issues can compromise your vehicle’s overall responsiveness.
Another warning sign is fluid leaks around the driveshaft area, which may indicate failing seals or damaged joints. Inspecting for any signs of leakage and addressing them promptly is essential to ensure the longevity of your vehicle’s drivetrain.
If your vehicle begins to pull to one side while driving, it can also indicate a misaligned driveshaft. Proper alignment is essential for ensuring even torque distribution to the wheels. Observing any changes in steering behavior can help you pinpoint alignment issues early on.
In summary, being attentive to these symptoms can help vehicle owners identify driveshaft issues promptly. Regular inspections and addressing these warning signs early will maintain vehicle safety and performance, preventing costly repairs in the future.
Step-by-Step Process for Driveshaft Inspection
Inspecting the driveshaft is crucial for maintaining vehicle performance and safety. Follow these steps to ensure a thorough inspection.
1. Gather Necessary Tools
Before starting, collect all necessary tools, including a jack, jack stands, a torque wrench, and a flashlight. Having everything on hand streamlines the process.
2. Elevate the Vehicle
Using a jack, raise the vehicle to gain access to the driveshaft. Secure it with jack stands to prevent any accidents while you work underneath.
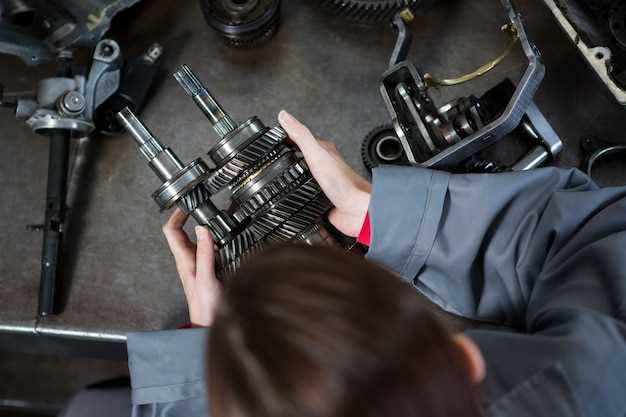
3. Visually Inspect the Driveshaft
Begin by visually inspecting the driveshaft for any obvious signs of damage such as dents, cracks, or excessive rust. Pay close attention to the points where it connects to the transmission and rear differential.
4. Check for Proper Rotation
Manually rotate the driveshaft while observing the U-joints. There should be no binding, excessive play, or unusual noises during rotation. If any irregularities are detected, further investigation may be necessary.
5. Inspect Universal Joints
Carefully examine the universal joints for any signs of wear. Look for grease leakage and test for any looseness by wiggling the shaft. Any movement that feels excessive may indicate a faulty joint that needs replacement.
6. Check the Mounts
Inspect the mounts securing the driveshaft. Ensure they are not cracked or damaged and are tightly fastened. Loose mounts can lead to vibrations and potential failures.
7. Look for Vibrations
While the vehicle is stationary, carefully rotate the driveshaft and listen for unusual vibrations. If present, further evaluation is needed to determine the source of the issue.
8. Perform a Test Drive
After completing the inspection, take the vehicle for a test drive. Pay attention to how it handles and listen for any strange noises that may emerge during operation. This will provide insights into any potential issues with the driveshaft.
9. Record Findings
Document any findings from your inspection, including any necessary repairs or replacements. Keeping accurate records ensures the longevity of the vehicle and assists in future maintenance.
10. Regular Maintenance
Incorporate driveshaft inspections into your regular vehicle maintenance routine. Proactive checks can catch problems before they escalate, ensuring optimal vehicle performance.
Common Tools and Techniques for Driveshaft Analysis

When inspecting a driveshaft, utilizing the right tools and techniques is crucial for accurate analysis. Here are some commonly used tools in driveshaft inspections:
1. Torque Wrench: Essential for verifying the proper torque specifications on driveshaft components. Incorrect torque can lead to excessive wear or failure.
2. Dial Indicator: This precision instrument measures the runout of the driveshaft. A dial indicator helps ensure that the driveshaft is straight and functioning correctly, and any significant deviation indicates potential issues.
3. Vibration Analyzer: Utilized to detect vibrations within the driveshaft during operation. It helps identify imbalances or misalignments, which can cause excessive wear and noise.
4. U-Joint Socket Tool: This specialized tool facilitates the removal and installation of universal joints. It is essential for conducting thorough inspections and replacements of U-joints in the driveshaft.
5. Caliper: A caliper is used to measure the diameter of the driveshaft or various components. Accurate measurements ensure that parts are compatible and function as intended.
6. Visual Inspection Tools: Flashlights and mirrors aid in examining hard-to-reach areas of the driveshaft. A thorough visual inspection can reveal cracks, rust, or other surface defects that may compromise its integrity.
In addition to these tools, employing the right techniques enhances the inspection process:
1. Rotation Test: By manually rotating the driveshaft, inspectors can feel for any unusual resistance or binding, indicating possible internal failures.
2. Lubrication Check: Ensuring that all moving parts are properly lubricated is essential for optimal performance. Inspectors should check for signs of grease leakage or dry joints.
3. Static Balance Test: In this technique, the driveshaft is supported at its center, allowing it to rotate freely. Any excessive wobbling indicates imbalance, which can affect the overall vehicle performance.
Utilizing these tools and techniques will facilitate effective driveshaft analysis and contribute significantly to vehicle maintenance and safety.