

How to Clean Your Throttle Body

The throttle body is a crucial component of your vehicle’s engine management system, playing a vital role in regulating airflow. Maintaining a clean throttle body is essential for optimal engine performance and fuel efficiency. However, the cleaning process requires precision and care to avoid damage. In this article, we will delve into the steps to clean your throttle body safely, ensuring that you follow a systematic approach.
Many car owners may overlook the importance of regular cleaning, but a dirty throttle body can lead to issues such as reduced acceleration, poor idle quality, and increased emissions. Understanding the right techniques and tools for the job is key to restoring your engine’s efficiency. This guide will provide you with practical tips, allowing you to take on the task of cleaning your throttle body with confidence.
By taking the necessary precautions and following our detailed instructions, you will not only enhance your vehicle’s performance but also prolong the life of the engine. Let’s explore the essential steps involved in this maintenance task and ensure that you do it safely and effectively.
Gather Necessary Tools and Materials for Throttle Body Cleaning
Before starting the cleaning process of your throttle body, it is essential to gather all necessary tools and materials to ensure a smooth and effective procedure. Having everything at hand will save you time and prevent any interruptions.
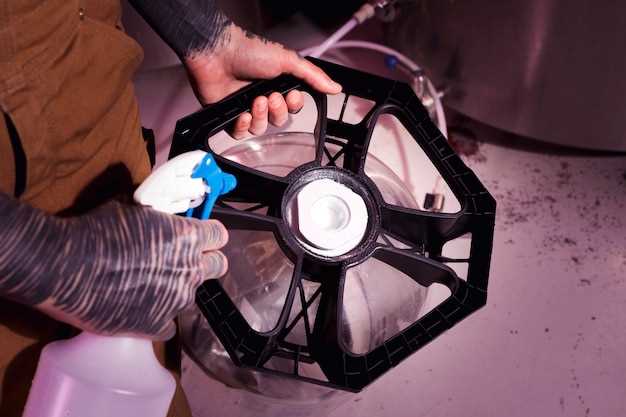
First, you will need a throttle body cleaner. This specialized solvent is designed to dissolve the buildup of carbon and other contaminants effectively. Ensure you choose a high-quality product suitable for your vehicle.
Next, gather a set of basic hand tools. A socket wrench set with various sizes is crucial for removing the throttle body from the intake manifold. You may also require a flathead and Phillips screwdriver for any additional components that may need to be unscrewed.
Additionally, keep a soft-bristle brush or an old toothbrush nearby. This will help you scrub away stubborn deposits without damaging the sensitive surfaces of the throttle body. Microfiber cloths will also be useful for wiping down the area both before and after cleaning.
Don’t forget to have safety equipment, such as gloves and safety goggles. These will protect your skin and eyes from the chemicals used during the cleaning process.
Lastly, a spray bottle filled with water can be handy for rinsing or neutralizing any leftover cleaner on the throttle body or surrounding components. Having all these tools and materials organized will facilitate a safe and efficient throttle body cleaning experience.
Step-by-Step Process for Disassembling and Cleaning the Throttle Body
Before starting the disassembly process, ensure you have the necessary tools, including a socket set, screwdrivers, a clean cloth, and throttle body cleaner. Safety goggles and gloves are recommended to protect your eyes and hands.
1. Disconnect the Battery: Start by disconnecting the negative terminal from the battery to prevent any electrical issues during the cleaning process.
2. Remove the Air Intake Hose: Locate the air intake hose attached to the throttle body. Use a screwdriver or socket wrench to loosen the clamps securing the hose. Carefully detach it, ensuring no damage occurs to the hose or surrounding components.
3. Disconnect Electrical Connectors: Identify any electrical connectors attached to the throttle body. Gently release the locking mechanism and disconnect them without damaging the wires.
4. Unscrew the Throttle Body: Using a socket wrench, remove the bolts securing the throttle body to the intake manifold. Keep track of the bolts for easy reinstallation later. Carefully pull the throttle body away from the manifold.
5. Inspect the Throttle Body: Before cleaning, inspect the throttle body for any signs of damage or excessive wear. Look for carbon build-up, which can affect performance.
6. Clean the Throttle Body: Use throttle body cleaner and a clean cloth to wipe the interior surfaces of the throttle body. Spray the cleaner onto the cloth rather than directly into the throttle body to avoid flooding. For stubborn deposits, a soft brush can help remove debris.
7. Clean the Throttle Plate: Ensure you clean both sides of the throttle plate thoroughly. Open the throttle valve manually to access the backside. Be gentle to avoid damaging the throttle mechanism.
8. Reassemble the Throttle Body: Once cleaning is complete, reattach the throttle body to the intake manifold. Secure it with the bolts previously removed, ensuring they are tightened to the manufacturer’s specifications.
9. Reconnect Electrical Connectors: Reattach any electrical connectors that were disconnected earlier, making sure they are locked in place securely.
10. Reattach the Air Intake Hose: Finally, reattach the air intake hose, securing it with the clamps to ensure a tight fit.
11. Reconnect the Battery: After everything is securely reassembled, reconnect the negative battery terminal. This completes the process.
12. Test the Vehicle: Start the vehicle and allow it to idle. Check for any irregularities in the engine’s performance, such as surging or rough idling, which may indicate further adjustments are needed.
Check for Issues After Cleaning and Reassemble the Throttle Body
After thoroughly cleaning the throttle body, it’s essential to inspect for any issues before reassembly. Begin by examining the throttle plate for smooth operation. Open and close the plate gently to ensure it moves freely without any sticking or resistance. Any obstruction can hinder the throttle’s performance.
Next, check the gasket and sealing surfaces for any signs of wear or damage. A compromised gasket can lead to air leaks, negatively affecting engine performance. If the gasket appears worn, it’s advisable to replace it before reassembling the throttle body.
Ensure all electrical connections and vacuum lines are intact and free from cracks. Damaged connectors or hoses can interrupt the throttle body’s functions and may trigger warning lights on the dashboard. It’s also crucial to verify that the throttle position sensor, if applicable, is properly connected.
After the inspection, carefully reassemble the throttle body by following the reverse order of disassembly. Make sure to tighten all screws and bolts to the manufacturer’s specifications. Once reassembled, double-check that all connections are secure and the assembly is aligned correctly.
Finally, start the engine to observe its behavior. Listen for any unusual sounds and monitor the idle speed. If the engine runs smoothly, your cleaning process and reassembly have been successful. If issues persist, further diagnostics may be necessary to pinpoint any underlying problems not related to the throttle body itself.