

DIY Guide to Bumper Repair

Your vehicle’s bumper is one of the most exposed parts, often taking the brunt of minor collisions and daily wear and tear. Damage to a bumper can range from superficial scratches to deep dents, significantly impacting the aesthetics and functionality of your car. Understanding how to assess and repair bumper damage can save you time and money, and prevent further deterioration.
In this comprehensive DIY guide, we will walk you through the process of evaluating the extent of the damage to your bumper and provide step-by-step instructions for effective repair. From gathering the necessary tools to finishing touches that enhance the appearance of your vehicle, this guide aims to equip you with the skills needed to restore your bumper to its former glory. Whether your bumper has a cracked surface or minor scrapes, you will discover practical solutions to tackle these issues head-on.
With a little time and effort, repairing your bumper can be a rewarding experience. Not only will you gain a sense of accomplishment, but you’ll also benefit from improved vehicle aesthetics and potentially increased resale value. Let’s dive into the details of bumper repair and ensure your car remains looking its best.
Assessing the Extent of Bumper Damage
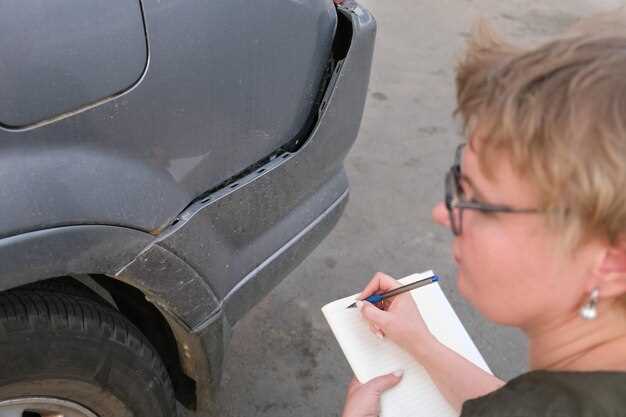
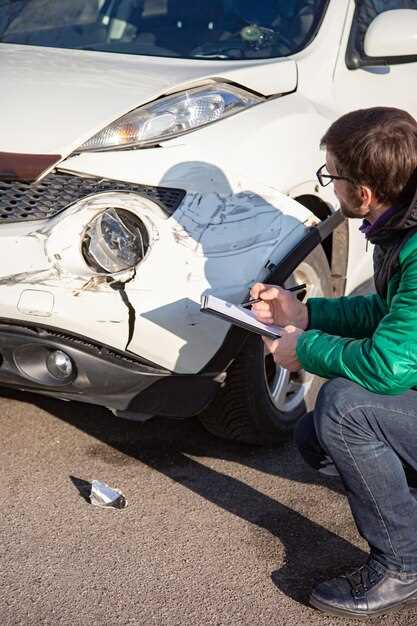
When undertaking a diy bumper repair, it is crucial to accurately assess the extent of the damage. Start by thoroughly inspecting the bumper for visible cracks, dents, or any signs of misalignment. Note that superficial scratches may require minimal repair, while deep cracks can indicate structural issues.
To begin your assessment, gently press on different areas of the bumper. If you feel any areas that are loose or flexible, this may signal underlying damage. Use a flashlight to examine the inner structure of the bumper; look for cracks or breaks in the material that may not be obvious from the outside.
Furthermore, check for paint damage, as this can lead to rust and further complications if not addressed. If the paint is chipped or peeling, measure the surface area affected to determine the level of repair work needed. A large area of damaged paint may require sanding and repainting, while small scratches can often be repaired with touch-up paint or polishing.
Once you have evaluated the visible and structural integrity of the bumper, consider taking photographs for reference. This will assist you in documenting the damage and help you strategize the repair process more effectively.
Finally, if you are uncertain about the severity of the damage after your assessment, consulting a professional can provide guidance on whether your diy approach is sufficient or if more extensive repairs are necessary.
Step-by-Step Process for Bumper Repair
Repairing your bumper can be a satisfying diy project that saves you money and keeps your vehicle looking great. Follow these steps to achieve a successful bumper repair.
Step 1: Assess the Damage
Begin by thoroughly inspecting the bumper. Identify all cracks, dents, or scratches that need attention. Take detailed notes or pictures for reference.
Step 2: Gather Your Tools and Materials
Collect everything you need for the repair. Common items include sandpaper, plastic filler, a putty knife, primer, and paint that matches your vehicle’s color. Having a heat gun or hairdryer can also help in softening the plastic during repairs.
Step 3: Clean the Area
Before starting the repair, clean the damaged area with soap and water. Remove any dirt, grease, or debris. Allow it to dry completely to ensure proper adhesion of repair materials.
Step 4: Sand Down the Damage
Using sandpaper, gently sand around the damaged area to create a smooth surface for the filler. Focus on roughing up the surface, as this will help the filler adhere better.
Step 5: Apply Plastic Filler
Mix the plastic filler according to the manufacturer’s instructions. Use the putty knife to apply it over the damaged area, filling in any gaps or cracks. Smooth it out as much as possible, and allow it to cure as directed.
Step 6: Sand the Filler
Once the filler has hardened, use sandpaper to sand it down until it is flush with the bumper. Start with a rough grit and progress to a finer grit for a smooth finish.
Step 7: Prime the Surface
After sanding, clean the area again and apply a primer suitable for plastic surfaces. Let it dry completely, following the recommended drying times.
Step 8: Paint the Bumper
Using paint that matches your vehicle’s color, apply thin, even coats. Allow each coat to dry before applying the next one. This step ensures a professional-looking finish.
Step 9: Clear Coat Application
After the paint has dried, apply a clear coat for added protection and shine. This step will help prevent future damage to the paint.
Step 10: Final Inspection
Once everything is dry, inspect your work. Look for any imperfections or areas that may need touch-ups. If satisfied, reinstall the bumper if it was removed during the repair process.
Following these steps will guide you through a successful diy bumper repair, restoring your vehicle’s appearance and durability.
Finishing Touches: Painting and Reinstallation
After completing the necessary repairs on your bumper, it’s time to focus on the finishing touches that will restore its appearance and protect it from future damage. Painting your bumper is a crucial step in the DIY process, ensuring a seamless look that blends with the rest of your vehicle.
Begin by preparing the surface of the bumper. Clean it thoroughly to remove any dirt, grease, or remaining debris from the repair process. Use sandpaper to smooth out any rough patches and ensure that the surface is even. Wipe down the area with a clean cloth and some alcohol or a suitable cleaning solution to eliminate dust and residue.
Select a high-quality automotive paint that matches your vehicle’s color code. If you’re unsure about the exact shade, consult your vehicle manufacturer’s specifications or visit an auto parts store for guidance. Applying primer is recommended to increase paint adhesion and durability. Spray a lightweight layer of primer on the bumper, allow it to dry completely, and lightly sand it if necessary for a smooth finish.
Once the primer is set, you can begin painting. Use even strokes to apply the paint, holding the spray can about six to eight inches away from the bumper. Apply multiple thin layers instead of one thick coat to prevent drips and ensure even coverage. Allow each layer to dry according to the manufacturer’s instructions before applying the next. Once the final coat is applied and dried, consider finishing with a clear coat for added protection and shine.
After your paint job has cured, it’s time to reinstall the bumper onto your vehicle. Carefully align it with the mounting points, ensuring that all brackets and clips are in place. Start by securing the bumper at one end and work your way across, checking for evenness as you proceed. Tighten the bolts and screws evenly, avoiding over-tightening which could cause future damage.
Once the bumper is properly installed and secured, take a step back to inspect your work. Ensure that there is no gap between the bumper and the body of the vehicle, and that all lines are aligned. Your DIY bumper repair is now complete, and with the right attention to detail, it should look as good as new.