

Signs of a Failing Radiator Cap

The radiator cap plays a crucial role in maintaining the pressure within your vehicle’s cooling system. Designed to seal the radiator and keep the coolant from escaping, this small component ensures that your engine operates at the optimal temperature. A malfunctioning cap can lead to significant loss of coolant and may hinder your engine’s performance.
Over time, wear and tear can affect the integrity of your radiator cap. As it deteriorates, the ability to maintain the necessary pressure diminishes, leading to potential overheating or engine damage. Identifying the signs that your radiator cap may need replacement is essential for preventing costly repairs and ensuring your vehicle runs smoothly.
Common indicators that your radiator cap may be failing include visible corrosion, leaks around the cap, or fluctuating engine temperatures. If you notice any of these symptoms, it’s imperative to address the issue promptly. Ignoring these warning signs can result in more severe loss of coolant and increased pressure in the engine, ultimately compromising your vehicle’s performance.
Identifying Pressure Loss in Your Cooling System
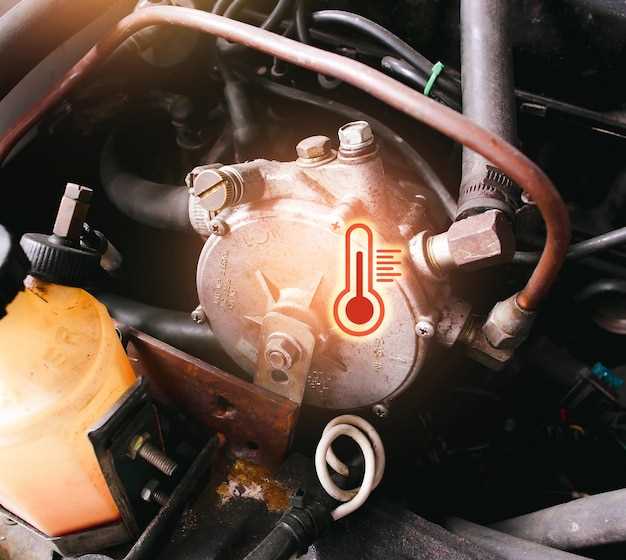
Pressure loss in your vehicle’s cooling system can lead to overheating and potential engine damage. One common culprit is the radiator cap. A malfunctioning cap may fail to maintain the necessary pressure, causing coolant to boil and escape.
To identify a pressure loss, start by inspecting the radiator cap for visible wear or damage. Cracks or loose seals can compromise its ability to hold pressure. If the cap is not sealing properly, it may allow coolant to escape, leading to loss.
Another sign of pressure loss is the presence of coolant leaks around the radiator or hoses. A sudden drop in coolant levels can also indicate that the system is losing pressure through a faulty cap.
Additionally, monitor your vehicle’s temperature gauge. If the engine overheats even when coolant levels are adequate, it may signal that the radiator cap is unable to maintain proper pressure needed for cooling efficiency.
Regular maintenance and inspection of the radiator cap can help prevent pressure-related issues. Replacing a worn or damaged cap is a simple yet effective solution to mitigate pressure loss in your cooling system.
Common Symptoms of a Failing Radiator Cap
A faulty radiator cap can lead to significant issues in your vehicle’s cooling system. One of the primary symptoms of a failing cap is a loss of pressure within the cooling system. The radiator cap is designed to maintain a specific pressure, which helps raise the boiling point of the coolant. When the cap malfunctions, it cannot hold the necessary pressure, resulting in the coolant boiling over or leaking.
Another common indicator is visible coolant leakage. If you notice coolant pooling beneath your vehicle or around the radiator area, it may suggest that the cap is not sealing properly. This leakage not only indicates a loss of coolant but also a drop in system pressure, which can lead to overheating and potential engine damage.
Additionally, if you experience frequent overheating despite having enough coolant in the system, the radiator cap may be to blame. A defective cap fails to maintain pressure, allowing the coolant to boil off and triggering an overheating warning. It’s crucial to address this issue promptly, as prolonged overheating can lead to severe engine problems.
Lastly, you may also hear unusual sounds such as hissing or bubbling coming from the radiator. These sounds often indicate that coolant is escaping the system due to insufficient pressure caused by a failing cap. Neglecting these signs can lead to more extensive repairs down the line, making it essential to monitor your radiator cap’s condition regularly.
Steps to Test and Replace Your Radiator Cap
Testing your radiator cap is essential to prevent coolant loss and maintain optimal pressure in the radiator system. Start by ensuring your engine is cool to avoid burns. Carefully remove the radiator cap, inspecting it for any visible signs of damage or wear, such as cracks or a deteriorated rubber seal.
Next, use a radiator cap tester, which can be purchased at automotive supply stores or borrowed from a local mechanic. Attach the tester to the radiator opening, and pump it to create pressure. The cap should hold pressure within the manufacturer’s specified range. If the pressure drops too quickly, it indicates that the cap is faulty and requires replacement.
When replacing the radiator cap, select a new cap that matches your vehicle’s specifications. Start by cleaning the radiator neck to ensure a proper seal. Align the new cap with the grooves and press it down firmly until you hear a click. This confirms that the cap is securely in place and will maintain the necessary pressure within the cooling system.
After installation, monitor your coolant levels and check for leaks, ensuring that the new cap effectively prevents loss and maintains optimal radiator pressure. Regularly inspect the radiator cap as part of your vehicle maintenance routine to extend the lifespan of your cooling system.